
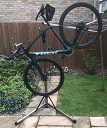
A couple of months back I bough a new Trek Domane SL 7 2022 model. It is awsome. I could rattle on all day about how easy and comfortable it is to ride, but this post is all about tubeless tyres, punctures and, in particualr topping up the sealant.
Being a virgin to tubeless tyres I was a little wary when the bike arrive with tubeless tyres (I thought I was getting the 2021 model – which is fitted with tubed tyres by default). However I was not about to look a gift horse in the mouth, the upgrade to the 2022 model being worth at least £300, plus the kudos of having a 2022 model.
The techie at C6 Waterbeach (where I bought the bike) gave me the quick 101 on tubeless tyres, and when I got home I did some further homework.
- Rule 1 – Do not over inflate. 80psi MAX – which for a tubed road bike is about the minimum you would want.
- Rule 2 – Always carry a spare tube. Why? Becuase if the tyre is damaged to the point where the sealant cannot seal the hole, then you will need to fit an inner tube to get you home.
- Rule 3 – Keep the sealant toppped up. The sealant does dry out over time and becomes less effective at sealing punctures. Recommended top period seems to be around 3 – 4 months.
- Rule 4 – Inspect for punctures on a regular basis. It is surprising easy to pick up a puncture and not know about it. The sealants these days are remarkably effective at sealing small (1 – 2 mm) holes with minimal loss of pressure.
So my story, 3 months in to getting my new bike I am topping up the tyre pressures prior to a quick spin around the country roads of Cambridgeshire when I notice a white substance on the tyre – yep, I had had a puncture, which has sealed, but there was residue sealant on the outside of the tyre. The puncture itself was quite small (approx 1mm) and seemed to be well plugged.
Time to investigate what that means wrt; Sealant longevity, tyre usage, relacement tyre etc.
So, best as I understand it, with a good sealant (and we will come on to that in a moment), a small puncture such as this, ie <= 1mm, should not cause a problem. At the time of the puncture, the sealant will congeal in a fraction of a second and there will be only a small drop in pressure, and that certainly matches my experience. I usually run my Tubeless tyres at just under the 80 psi recommended max, and tyre pressure the next day was still well above 60 psi. Proof that the sealant will work sufficiently to allow you to complete whatever ride you are on and get you ‘home’.
What about longevity of the seal. How long should you continue to rely on it? Well reading the articles on the internet, the consenus seems to be that, for small punctures, you can rely on the seal and ride normally. A couple of well respected sites say they would not be concerned about putting an additional 1000+ miles on the tyre before replacing it.
A caveat to that is that you must keep the sealant topped up, preferably every 3 – 4 months. Beyond that it will start to congeal in the tyre and will no longer successfully re-seal the puncture should the plug ever detach.
Sealant Top-up Instructions for Fixed Inserts
The following instructions are as much for myself as anyone else, but if you find them useful, all the better.
First point – I am dicussing valves with Fixed inserts. Whether the valves are Presta or Schrader doesn’t matter, if the insert is fixed then these instructions will work.
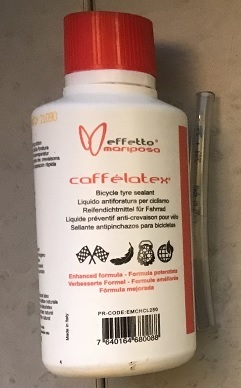
- For fixed inserts you need a free flowing, non viscous, sealant. Many sealants will only work with removalable inserts. So check sealant type. My recommendation for Fixed Inserts is Coffelatex. It scores excellant marks in many of the reviews, is inexpensive, and, in my experience, works perfectly for fixed insert valves.
- For fixed inserts you will also need the Coffelatex Injector. Inexpensive (< £10 and well worth it)
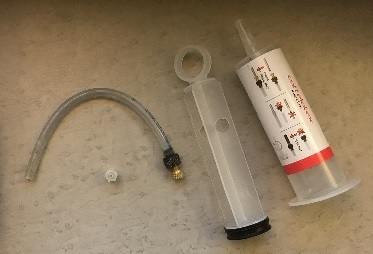
- Step 1: Remove the Syringe : Tube connector from the Syringe Plunger and attach to the tube. Note: It is a VERY tight fit, but it is essential that the connector is securely fitted to the tube.
- Step 2: Fully undo the value and release all the air in the tyre.
- Step 3: With the valve fully open, attach the tube to the valve. With fixed inserts ignore the instructions on the Injector, you will ALWAYS need the brass adaptor, regardless of valve type.
- Step 4: Rotate wheel so valve is at 3 o’clock or 9 o’clock and use a piece of fixing tape, or something, to hold the wheel at that position.
- Step 5: Remove plunger from syringe
- Step 6: Attach syringe to tube.
- Step 7: Fill syringe with requisite amount of sealant (Usually about 50ml)
- Step 8: Insert plunger and push
- Step 9: Sealant should readily flow into wheel.
- Step 10: Disconnect injector and tube from the value, and screw value shut
- Step 11: Spin wheel 3 or 4 times to evenly disperse the sealant around the inside of the tyre.
- Step 12: Pump tyre up to 60 – 80 psi.
- Step 13: Clean any excess sealant off tyres, wheels, and particularly the clean the applicator equipement – I found hot soap water was good for the applicator, syringe, etc.
Removalable Inserts
With Removalable valve inserts I found the easiest, (and cleanest) is to:
- Remove Valve Insert
- Attach filling tube adapter (the black bit) to value
- Rotate wheel until value is at the top.
- Attach filling tube to adapter
- Attach the bottle containing the sealant direct to the filling tube (i.e. Do not bother with the syringe)
- Rotate the wheel through 90 degrees.
- Gently squeeze the sealant bottle, squirting the sealant into the tyre.
- When requisite amount of sealand has been administered – rotate the wheel back to the verticle position and disconect everything
- Insert the value
- Spin the wheel to disperse the sealant
- Inflate to required pressure.