
Introduction
The concept of High Dynamic Range – HDR – has been with us for quite some time, and is actually very simple. Image exposure is often a compromise between some areas being under exposed, some being over exposed, others being exposed just right. HDR is the idea of blending multiple images of the same subject to get the level of exposure correct across the whole image.
Take, for example, landscapes on bright sunny days. The foreground & middleground maybe correctly exposed, but the sky can be gloriously over-exposed, with cloud detail lost, and colour just washed out. Polarising filters can (and do) help, but even so it can be difficult to capture the detail that you would like with a single exposure.
In the world of digital photography, where the cost of an image is negligable, a first order solution to the exposure probolem is to use bracketing, and I have to say that I have been using this function on my various DSLR Nikons for a number of years. Basically set the camera up to take a number of exposures either side of the correct exposure. In my case I use 3 exposures at -0.3EV, 0.0 & +0.3EV.
And before we go any further I guess I should indicate what I mean by the correct exposure. My Nikon cameras have always done a pretty good job at calculating exposure. They provide a number of exposure options to suit the picture being taken from Matrix, to Centre-Weighted, to No over-exposure in Centre-Weighted area, to Spot. And whilst I will often adjust Speed, Aperature &/or ISO depending on the subject and required effect, I do 99% of the time find myself accpeting Nikon’s assessment on exposure.
Taking three exposures per shot does mean the first item on my agenda when I review my images is to decide which of the three I prefer. Its a bit time consuming, and, as I indicated above, the Nikon does do an excellent job of chosing exposure. But, even so, there are times when I will prefer one of the the outside images to the centrally exposed one. (As an aside, if I do choose off centre it will usually be the -0.3EV exposure, rarely for the +0.3EV)
However the fact that I have the three exposures does mean I am in a position to undertake a bit of image merging to improve the final image.
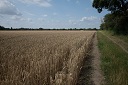
HDR Example
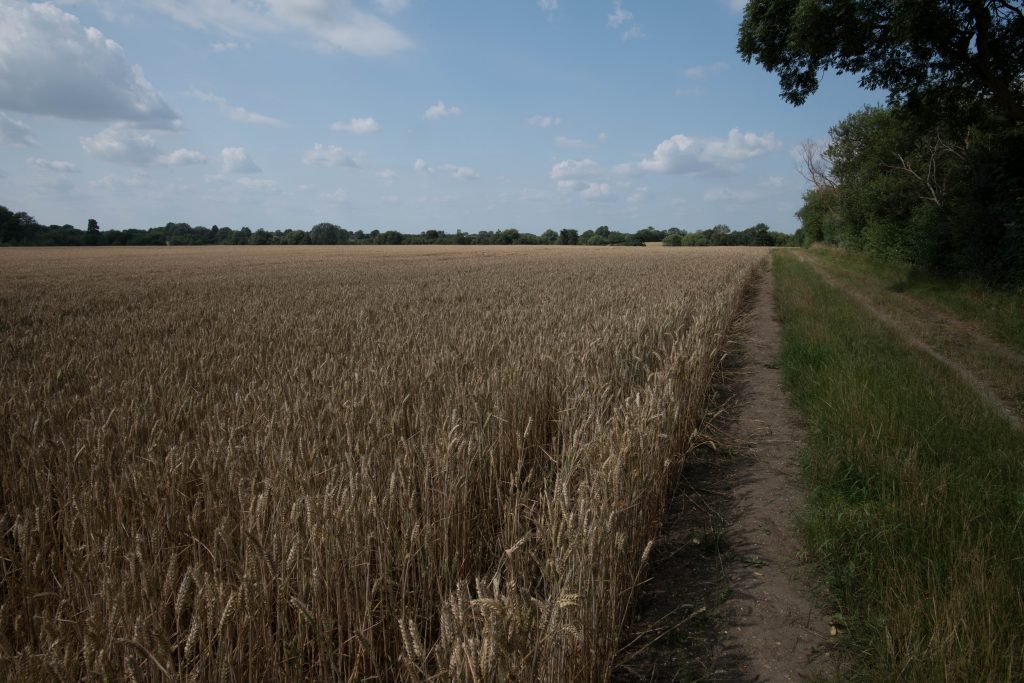
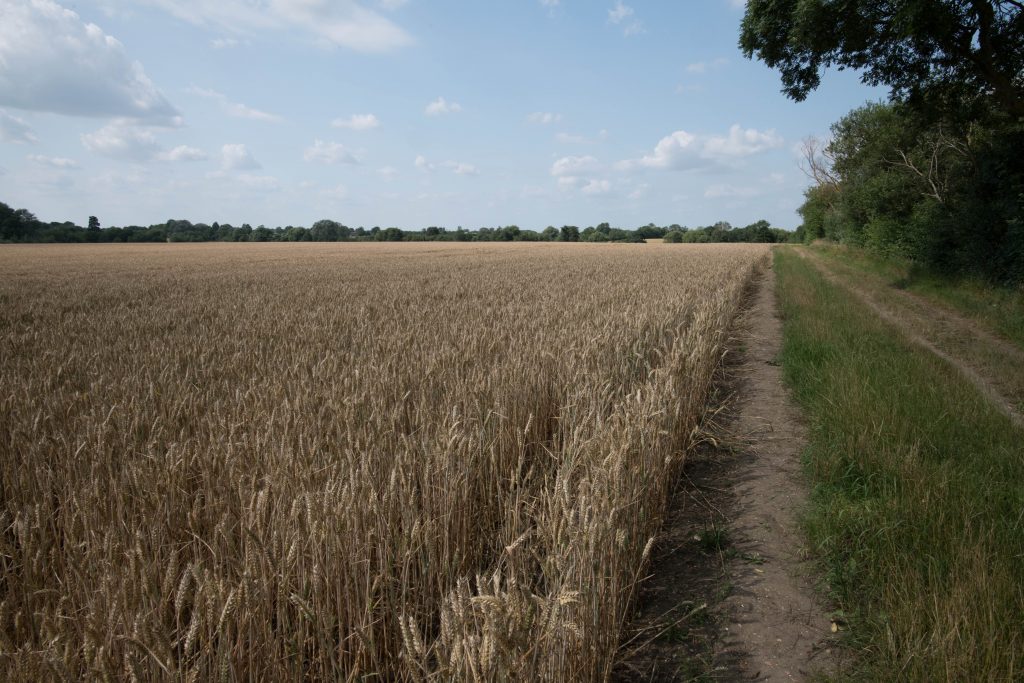

In the above images, I thought the golden glow of the wheat really benefited from the extra exposure, but, as can be seem from the top right image, that extra exposure bleached the sky. A combination of the sky from the -0.3EV image with the wheat et al from the +0.3EV produces, IMHO, a much more pleasing image.
You could, potentially achieve a similar effect, by either manipulating the sky colour, or even substituting a completely new sky, but there is something pleasing about using HDR, in that nothing is artificial, its just combining two (or more) images of the same scene.
A few points though to let you know HDR is not as simple as I have made out.
- If the camera is not both tripod mounted and triggered by a remote, then there will be camera movement between images. It may be very small, but it will be there.
- Even if the camera does not move, the scene may well. Clouds, Trees, Birds and other Aminals, Cloud Shadows, all of these will move between shots.
- The above two points means you may need to undertake some level of image registration (ie alignment) and you will certainly need to determine the blend line(s) between the images with care.
- There will need to be a gradual merging from one exposure to the other at the blend line. Without that you will have jarring and obvious join line(s). Indeed if you look closely at the merged image above you may discern a blend line in the sky on the right had side, just above the tree line. (That can be erased by careful use of the blur tool, but IMO the blur tool is a blunt instrument that should be used sparingly.)
HDR & Adobe Elements
I use Adobe Elements as my Image Editor. (There are better I know, but the better ones are more expensive.) The following is a quick walk through on how to blend images using Elements to capture HDR .
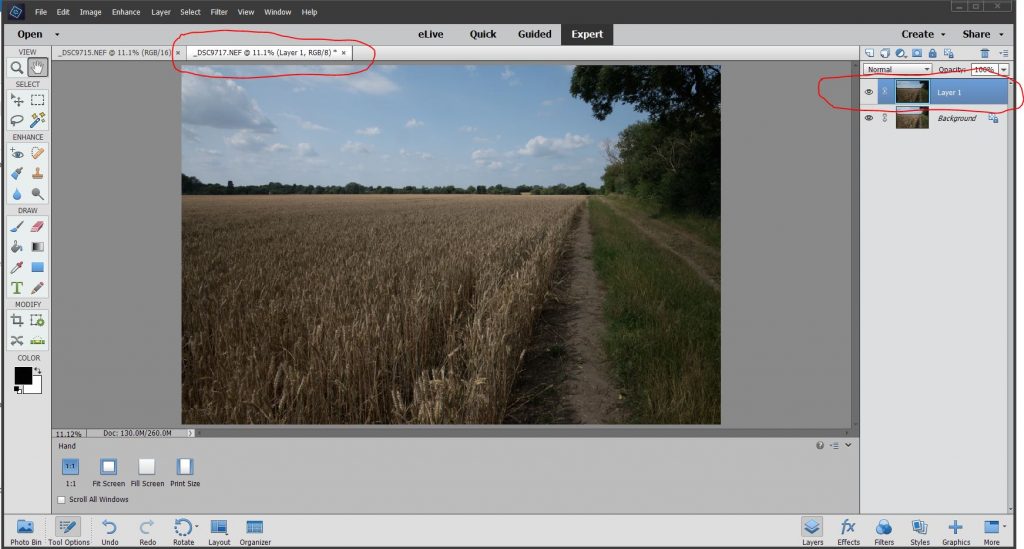
To blend two or more images we will use Layers. Layers can be thought of as the digital equivalent of the transparent acetates that people used to use before digital presentations. Each layer hides what ever is below, except where a layer is transparent (i.e. has no image)
Start by firing up the Adobe Elements Editor and loading the two (or more) images.
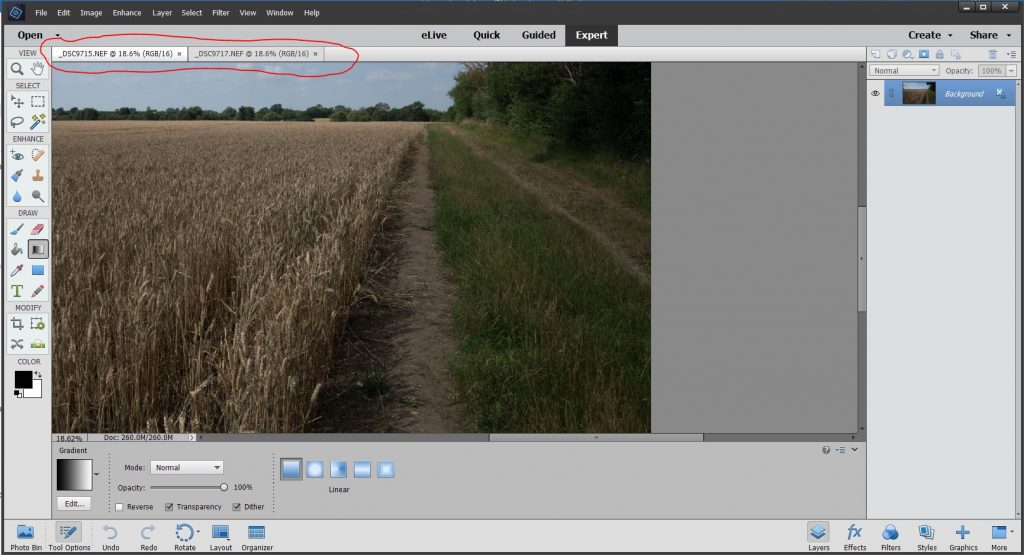
Select the image which you want to blend into your main image. And then execute a Copy all. (i.e <CTRL>-A : <CTRL>-C).
Then select your main image and hit <CTRL-V> to paste the ‘Blend from Image’ onto your main image. (Depending on your version of Elements you may get a ‘Convert Depth’ message – just accept this). This will create a new layer with the whole of the blend from image. At this point all you will see displayed is the ‘Blend from Image’. Don’t worry we are about to remove the bits we don’t want.
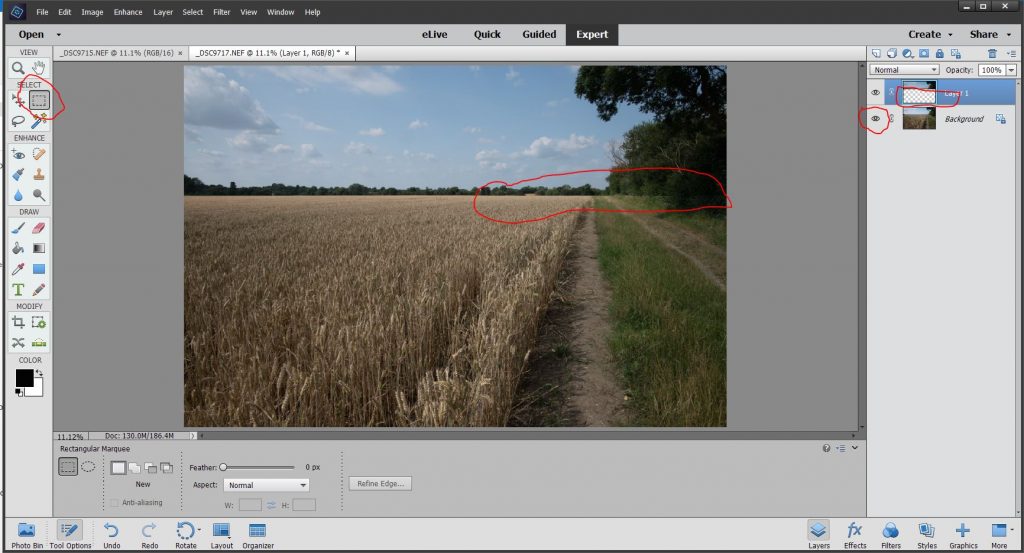
It is now time to decide what aspects of the ‘Blend From Image’ you want to keep, and which to retain from the main image. In this case (and I have deliberately chosen a simple case) I decide to retain everything below the hedge / wheat line for the main, and use the sky and hedge from the ‘Blend from Image’.
So, ensure Layer 1 is selected. Then use the Rectangular Selection tool to select everything below the hedge/ wheat line, and hit delete. The effect is that you will now see everything below that line from the main image. The problem, however, is that there is a marked demarkation line, particularly visible on the right of the image, but actually noticable along the whole length.
To eliminate the demarkation line between the two exposure settings we are going to create a ‘Blend Region’, and across this region gradually fade between the two exposures.
First, click on the little eye on the background layer entry to make that layer invisible. This will assist in visualizing the blend area.
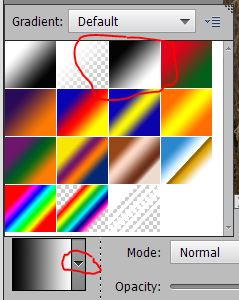
Next select Layer 1 and click on the ‘Add Filter ICON’ ![]() . This allows us to define a gradient filter across the image where the image will gradually fade out. With the filter item selected (it should be highlighted with a Cyan border), click on the gradient tool
. This allows us to define a gradient filter across the image where the image will gradually fade out. With the filter item selected (it should be highlighted with a Cyan border), click on the gradient tool ![]() in the DRAW toolbox. In the options area select Linear Gradient, and from the Gradient Style set select item three.
in the DRAW toolbox. In the options area select Linear Gradient, and from the Gradient Style set select item three.
Now comes the trial and error bit. With the background layer still invisible, trace a line from the bottom of the actual image on layer 1 upto the top of whatever region you think will make a good blend region. That area will then fade from fully visible to fully invisible.
Make the background layer visible again and inspect the result. If there is a noticable blend then try again with a longer line. If you have lost too much of the Blend from Image, then try again, but with a shorter line. Repeat until happy.